Indoor light · Measurement · Care note 003
A houseplant grow-light setup you can measure
A lamp becomes useful plant care only when its light reaches the leaves for a suitable number of hours. Map the shelf, read the fixture data, protect a dark period, and adjust from evidence.
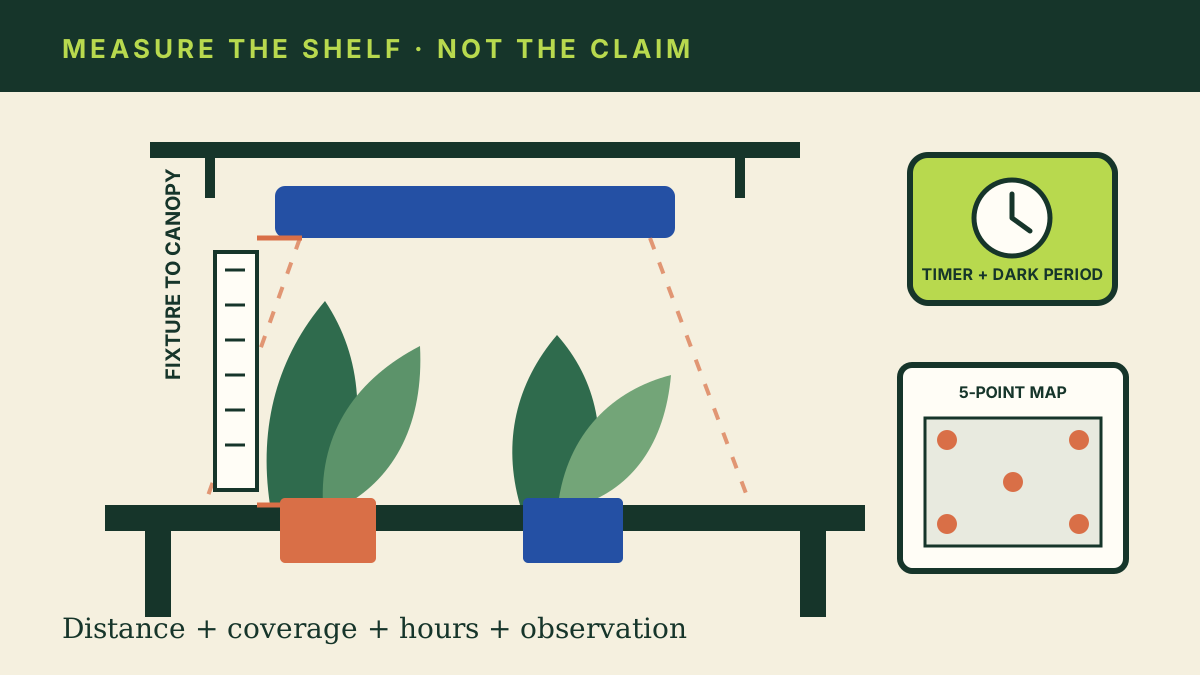
Shorter fall days expose a common weakness in plant-care advice: “put it under a grow light” is not a setup. A small bulb high above a crowded shelf may brighten the room while delivering little usable light to the outer leaves. A powerful fixture placed too close can create hot spots, pale tissue, or an uncomfortable glare. Distance, coverage, duration, the plant’s needs, and existing window light all belong in the same decision.
Recent public questions tend to circle the same gaps: how close should the lamp be, how many plants can one fixture cover, whether watts or lumens matter, and how PPFD becomes a timer setting. The useful answer starts with the manufacturer’s data and a repeatable measurement at leaf level. It ends with plant response, not a universal distance copied from another shelf.
1. Define the light’s job before choosing hardware
Decide whether the fixture will supplement a window, maintain foliage plants through winter, support flowering plants, or provide nearly all the light for herbs or seedlings. These are different jobs. A lamp that adds a few evening hours to a bright window should not be judged by the same standard as a fixture over a basement propagation rack.
List the plants and group them by their documented light requirements, mature height, and sensitivity to day length. A mixed shelf often fails because a tall, high-light plant forces the fixture upward while a short plant remains outside the strongest area. Use risers for shorter pots or separate plants with very different needs. Keep species that require a particular photoperiod for flowering—such as poinsettia, chrysanthemum, and holiday cactus—on a schedule that preserves their required uninterrupted darkness.
Record the natural-light window. Note direction, obstructions, direct-sun hours, and how conditions change on cloudy days. Supplemental light fills a gap; it does not erase the light already reaching the leaves. If the fixture is the only meaningful light source, say so in the care record.
Write the fixture model, installation date, timer hours, measured distance from the emitting surface to the highest leaves, plant group, and the next review date. Photograph the shelf from the same position each week.
2. Read the specifications that answer a plant question
Watts describe electrical input, not how much plant-usable light reaches a particular leaf. Lumens and lux describe light weighted for human vision. They can help compare the same lamp in the same setup, but they do not directly describe photosynthetically active photons. “Full spectrum” is also not a complete performance claim.
For plant lighting, look for a PPFD map at stated mounting distances. Photosynthetic photon flux density, or PPFD, measures how much photosynthetically active light reaches a square meter each second. University of Missouri Extension explains that PPFD changes with distance and position, and that a fixture map should show values across the growing area rather than only a bright center point.
PPF describes the total photosynthetically active photon output of the fixture. Efficacy describes output per unit of electrical input. Both are useful for comparing fixtures, but neither shows how evenly a particular shelf will be lit. A credible brief should include fixture dimensions, power draw, spectrum information, coverage or PPFD maps at named heights, environmental rating, mounting instructions, warranty, and safety certification.
| Label item | What it tells you | What it cannot tell you alone |
|---|---|---|
| Input watts | Electrical demand | Light at leaf level |
| PPF | Total PAR photons emitted each second | Distribution over the shelf |
| PPFD map | Intensity by position at a stated height | The plant’s correct target |
| Spectrum graph | Relative output by wavelength | Coverage or intensity |
| Coverage claim | A proposed lit area | Useful intensity unless criteria are stated |
| Safety and location marking | Evaluated use conditions | Permission to ignore installation directions |
If the seller provides no model-specific map, distance, test method, or safety information, the claim is difficult to verify. Green Leaf Depot keeps branded listings, prices, availability, and checkout unavailable until supply authorization and approved product data exist. The Depot standard explains the evidence required before any fixture could appear as more than an unbranded planning brief.
3. Measure from fixture to leaves, then map the whole shelf
Measure from the light-emitting surface to the top of the plant canopy, not from the ceiling or shelf above. A foliage plant grows upward, so the distance changes. Record the closest leaf and the shortest plant. Follow the fixture manufacturer’s minimum clearances and mounting directions before moving anything closer.
University of Minnesota Extension gives broad starting distances of 12 to 24 inches for foliage houseplants, 6 to 12 inches for flowering houseplants, and 4 to 6 inches for seedlings. These are orientation ranges, not overrides for model-specific instructions. Beam shape, output, heat, lensing, plant sensitivity, and natural light can make the correct position different.
Coverage matters as much as the center reading. Divide the plant area into five points: center and four corners. Use the manufacturer’s PPFD map at your mounting height or measure with a suitable quantum sensor. A phone application or lux meter can be useful for repeatable comparisons within one setup, but its absolute plant-light reading may depend on the device, diffuser, calibration, and light spectrum. Label such readings as estimates.
- Set the fixture at the maker-approved starting height.
- Place plants within the documented coverage area.
- Measure or read the estimated intensity at center and four corners at canopy level.
- Move tall plants away from the center if they shade smaller plants.
- Use a second fixture or a smaller plant group when edge readings are much weaker.
- Recheck after growth, pruning, rotation, or a fixture-height change.
Do not rotate a plant to disguise an uneven setup. Rotation can even growth at a window, but a lamp should still cover the intended canopy. If one half of the shelf is outside the useful footprint, treat it as a separate lighting zone.
4. Set hours from total light, then protect darkness
Daily light integral, or DLI, combines intensity and time. When PPFD is constant, a useful calculation is:
Example: an average 100 µmol/m²/s for 12 hours provides about 4.32 mol/m²/day from that fixture. Window light adds to the day’s total, and changing distance changes PPFD.
The formula explains why moving a light closer and running it longer are not interchangeable without limits. Longer operation cannot compensate indefinitely for a lamp that barely reaches the foliage, and excessive intensity can waste energy or damage plants. Use a plant-specific, research-based target where one is available. Avoid inventing a precise DLI for a named houseplant from an uncited chart.
For broad orientation, University of Minnesota Extension recommends 12 to 14 total light hours for foliage houseplants and 14 to 16 for flowering houseplants, while noting that flowering responses differ by species. University of New Hampshire Extension likewise recommends full-spectrum supplemental light for many winter houseplants when window light is inadequate. Set a timer so the schedule is consistent and so the plant receives darkness each day.
Choose a schedule that works with the window rather than lighting the shelf around the clock. A morning extension can suit one room; an evening extension can suit another. Keep bright horticultural light out of sleeping areas and avoid staring into intense fixtures. Follow all instructions about eye exposure, shades, and mounting.
5. Keep water, wiring, and mounting decisions separate
Plant shelves combine electricity, water, humidity, adjustable hardware, and sometimes reflective surfaces. Use a fixture evaluated and marked for its intended environment. UL Solutions notes that horticultural-lighting safety evaluation addresses wiring, environmental ratings for damp or wet locations, dust and water ingress, mounting, and photobiological safety. A dry-location lamp does not become suitable near splashing simply because it is sold for plants.
Mount the fixture with the supplied or approved hardware and keep cords from bearing the fixture’s weight. Create a drip path so water cannot run toward a plug, driver, timer, connector, or power strip. Unplug equipment before changing the shelf or cleaning around it. Keep foliage and stored supplies outside required clearances and allow heat to dissipate as the manufacturer specifies.
A permanent setup should reach a suitable receptacle without daisy-chained extension cords. The U.S. Consumer Product Safety Commission warns that inadequate or damaged extension cords create shock and fire risks. Never run cords under rugs, remove a grounding prong, use a damaged cord, or exceed a cord’s marked rating. Have a qualified electrician address an inadequate outlet or fixed-wiring need.
Inspect the setup weekly: plug, cord, connector, timer, driver, fixture, hanging points, shelf stability, and signs of heat or moisture. Stop using equipment that is damaged, unusually hot, flickering, discolored, loose, or wet until the cause is resolved.
6. Run a seven-day audit before making several changes
Start conservatively within the fixture and plant guidance, then hold distance and hours steady for a week. Record new growth direction, leaf color, internode length, soil-drying time, room temperature, and any curling, bleaching, or crisp areas. Take the comparison photo at the same time of day.
Plants recently moved inside may be responding to several changes at once. The fall transition guide covers inspection, isolation, lower-light adjustment, and indoor watering. Do not assume every yellow leaf is a light problem and then change light, water, fertilizer, pot, and humidity on the same day.
| Pattern | Check first | Measured adjustment |
|---|---|---|
| Growth leans or stretches toward the fixture | Coverage, distance, natural light, plant-specific habit | Improve position or coverage within fixture guidance |
| Pale or bleached area nearest the lamp | Intensity, heat, recent abrupt move | Increase distance or reduce exposure gradually |
| Outer plants lag while center thrives | Five-point map and shading | Reduce the footprint or add a properly placed fixture |
| Medium stays wet longer | Actual growth, temperature, roots, drainage | Water from observed need; do not force growth with fertilizer |
| No visible change | Time scale, season, species, roots, temperature | Keep records longer before escalating light |
After seven days, change only one setting—height, hours, or plant position—and record it. Recheck the five-point coverage whenever height changes. Review again after four weeks, then monthly through winter. Clean dust from leaves and the fixture only as their care instructions allow.
A ten-minute shelf record
- Write the fixture model and the job it must do.
- Photograph or save the PPFD map for the installed height.
- Measure fixture-to-canopy distance at the tallest and shortest plants.
- Record center and four-corner readings or map values.
- Set the timer and note total natural plus supplemental light hours.
- Check the mounting, cord, plug, driver, timer, water path, and clearances.
- Photograph the plants and set a seven-day review.
A useful light plan can be repeated, checked, and explained. It does not promise that one distance works for every lamp or every leaf. Measure the actual shelf, use the plant’s documented needs, follow the fixture instructions, and let several weeks of recorded response guide the next small change.